You KNOW you like those browned exteriors of your meat, but how exactly does searing come into play here?
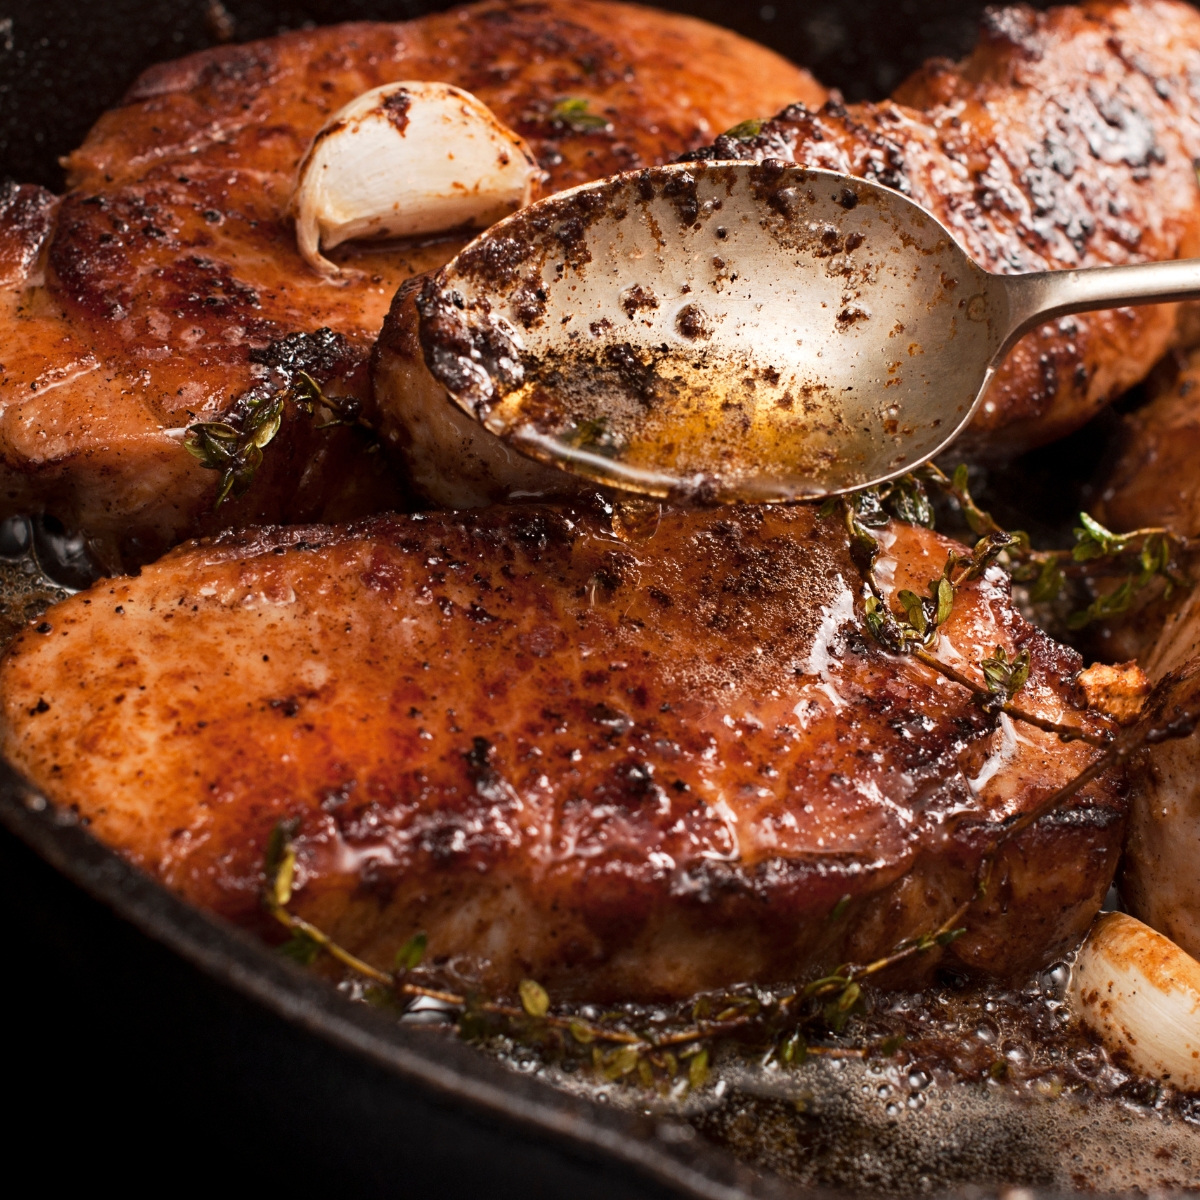
Searing is a technique where the surface of food (usually meat, poultry, or fish) is cooked at high temperatures until a caramelized crust forms through the Maillard reaction. Similar techniques like browning are typically used to sear all sides of a piece of meat before finishing it in the oven.
In this article, I’ll explain when to use it and how to do it properly.
In this post we'll cover:
What is Searing?
Have you ever been burned by a bullet? No? Well, that’s because bullets travel faster than the speed of sound, so you’d get seared before you even heard it coming.
Searing is a cooking technique that any serious chef should master. It involves applying intense heat to the surface of the meat for a short period of time. The result? A delicious aroma, a beautiful browned exterior, and an extra layer of flavor.
Why Searing?
Searing is a great way to get the most out of your meat. It’s all thanks to the Maillard reaction, which is a chemical reaction between amino acids and reducing sugars that occurs when the meat is exposed to high heat. This reaction creates a flavor and aroma that can’t be replicated any other way.
How to Searing?
If you want to get the most out of your meat, you need to master the art of searing. Here’s what you need to do:
- Preheat your pan or grill to a very high temperature.
- Place your meat on the pan or grill and let it cook for a short period of time.
- Flip the meat and let it cook for a few more seconds.
- Remove the meat from the heat and enjoy!
Searing is a great way to take your cooking to the next level. So go ahead and give it a try!
Searing: A Quick and Flavorful Way to Cook
What is Searing?
Searing is a cooking technique that adds flavor and a dark brown color to food. It’s a controlled burn that’s much different than burning, which adds a bitter taste and black color. It’s like a brief and intense period of cooking that quickly cooks the outside of the food, while the inside is cooked more slowly until it’s done.
The Benefits of Searing
Searing is a great way to get a delicious flavor profile in a short amount of time. It involves a blast of high heat for a short period of time, rather than cooking for a long time at a constant temperature. Here are some of the benefits of searing:
- Adds flavor and dark brown color
- Quick and intense cooking
- Creates a delicious flavor profile
- Cooks outside quickly, while inside is cooked slowly
For Those Who Enjoy Charred Meat
If you’re one of those who enjoys the taste of charred meat, you’ll want to sear a little longer than normal. You may even want to go Chicago-style, which is a whole other topic. Just remember that searing is a quick and intense cooking method, so you don’t want to cook it too long.
The Juicy Debate: Sealing in the Juices
The Origin of the Theory
It all started back in 1850 when a guy named Liebig had a crazy idea – that searing meat would “seal in the juices”. This theory was quickly embraced by some of the top chefs and authors of the time, including a guy named Escoffier. People were convinced that if you seared steaks and chops, you’d be able to keep all the yummy juices inside.
The Experiment
Fast forward to the 1930s and some brave scientists decided to put this theory to the test. And guess what? They found that searing roasts actually made them lose more liquid! Yup, it turns out that searing exposes the meat to higher temperatures which destroys more cells and releases more liquid.
The Final Verdict
So what’s the bottom line? Well, it turns out that searing doesn’t actually “seal in the juices”. In fact, it can actually cause even more liquid to escape. But don’t worry, there’s still a good reason to sear your meat. It’s all about the flavor! Searing your meat at the end of the cooking process helps to bring out the delicious Maillard reaction flavors. Plus, it also helps to keep your meat nice and moist.
How to Sear Meat Like a Pro
Pan Searing
If you want to sear your meat like a pro, then pan searing is the way to go! Here’s what you need to do:
- Heat up a pan on high heat.
- Add some oil or butter to the pan.
- Place your meat in the pan and let it sizzle.
- Flip the meat over after a few minutes.
- Let the other side cook until it’s nice and brown.
- Serve it up and enjoy!
Oven Searing
If you’re looking for an easier way to sear your meat, then oven searing is the way to go! Here’s what you need to do:
- Preheat your oven to a high temperature.
- Place your meat on a baking sheet.
- Drizzle some oil or butter over the meat.
- Place the baking sheet in the oven and let it cook.
- Flip the meat over after a few minutes.
- Let the other side cook until it’s nice and brown.
- Serve it up and enjoy!
Grilling
If you want to get that smoky flavor, then grilling is the way to go! Here’s what you need to do:
- Heat up your charcoal grill or high heat grill.
- Place your meat on the grill and let it cook.
- Flip the meat over after a few minutes.
- Let the other side cook until it’s nice and brown.
- Serve it up and enjoy!
What Not to Do
No matter how desperate you are to get that seared flavor, don’t even think about using a microwave! Microwaves don’t get hot enough to create that nice brown crust. So don’t even try it, or you’ll end up with a soggy mess.
Grilling Meat Like a Pro
Prepping the Grill
If you want to make your meat taste like it was cooked by a seasoned pro, you’ll need to get your grill ready. Here’s what you need to do:
- Preheat your grill for 20-30 minutes. This will get the grates up to the perfect temperature (500F or more) and burn off any leftovers from the last cookout.
- Let the meat come to room temperature. This will help it cook faster and reduce moisture-causing contraction on the grill.
Cooking the Meat
Once your grill is prepped, it’s time to start cooking! Here’s what you need to do:
- Put the meat on the grill and let it sit for 2-3 minutes with the lid off. The time will depend on the thickness of the cut.
- Flip the meat onto a clean section of the grill grates. Let it sit for another 2-3 minutes and don’t touch it.
- Use an instant read thermometer to check if the meat is done. If it is, take it off the grill and let it rest for a few minutes before serving.
- For thicker cuts, move the meat away from direct heat and let it cook until it reaches the right internal temperature (as measured by a thermometer).
Can You Sear Meat in the Oven?
The Pros and Cons
Searing meat in the oven is a bit of a controversial topic. On one hand, you don’t need a grill and you can get good results with a skillet or pan. On the other hand, it takes a lot longer and the results may not be as good as with a grill. So what’s the verdict?
The Verdict
If you’re looking to sear a smaller cut of meat like a steak, the oven might not be the best option. It’s likely to overcook the center before the outside has had a chance to properly sear.
But if you don’t have a good enough pan for high-heat cooking, you could give the oven a go. Just be prepared for the results to be less than stellar.
The Bottom Line
So can you sear meat in the oven? Technically, yes. But should you? Probably not. Here are some pros and cons to consider:
Pros:
- No need for a grill
- Can get good results with a skillet or pan
Cons:
- Takes a lot longer
- Results may not be as good as with a grill
- Smaller cuts of meat like steak may overcook before the outside has had a chance to properly sear
Cooking Steaks the Inverted Way
What is Reverse Searing?
Reverse searing is the opposite of what you’d expect when cooking a steak. Instead of searing the steak first and then cooking it through, you cook it through first, and then sear it. It’s like turning the cooking process upside down!
Why Reverse Sear?
Reverse searing is a great way to get a consistent internal temperature on thicker cuts of steak. It’s recommended for steaks that are 1-1.5 inches thick. Here’s why:
- It allows for even cooking throughout the steak
- The outside gets a nice sear, giving it a delicious flavor
- You get the Maillard reaction, which is the scientific name for that yummy browning of the steak
How to Reverse Sear
Reverse searing is easy to do. Here’s how:
- Start by cooking the steak at a low temperature until the center reaches the desired temperature
- Then, crank up the heat and sear the outside of the steak
- Enjoy your perfectly cooked steak!
Differences
Searing Vs Browning
Searing and browning are two cooking techniques that are often confused. Searing is the process of cooking food at a very high temperature with very little oil in the pan. This is done to create a dark, caramelized crust on the outside of the food. Browning, on the other hand, is a much gentler process. It simply involves lightly cooking the outside of the food with a bit more oil in the pan. So, if you’re looking for a delicious, crunchy crust on your steak, searing is the way to go. But if you’re looking for something a bit more subtle, browning is the way to go.
FAQ
What Does Searing Actually Do?
Searing is a key step to creating a delicious steak, but it’s not what you think. Contrary to popular belief, searing does not actually lock in moisture and make your steak juicier. In fact, Alton Brown conducted an experiment that showed that steaks that were seared before roasting actually lost more moisture than those that were just roasted. So why bother searing? Well, it’s all about flavor and texture. When you sear your steak, you’re creating a golden, caramelized crust through a process called the Maillard reaction. This reaction happens when you cook above 250 degrees and it imparts a savory flavor and aroma that will make your mouth water. So, while searing doesn’t retain water, it does give you a delicious steak.
Can You Sear On A Regular Pan?
Yes, you can definitely sear on a regular pan! All you need is a good non-stick skillet and some oil or butter. The key is to heat the pan until it’s really hot, then add the oil or butter. Once the oil is hot, add the food and let it cook until it’s golden brown. Make sure to keep the heat high and don’t move the food around too much. With a little patience and practice, you’ll be searing like a pro in no time!
Is Searing Fully Cooking?
No, searing is not the same as fully cooking food. While it may look like you’re cooking the food all the way through, you’re actually just trying to create a dark, caramelized crust on the outside. It’s like browning, but it’s taken one step further. You need to get the surface of the food to a temperature of at least 300°F to get that nice, crispy crust. But don’t worry, you don’t have to worry about it being fully cooked – that’s what the oven is for! So when you’re searing, you’re really just trying to get that delicious flavor and texture.
Do You Add Oil When Searing?
When it comes to searing, oil isn’t just a cooking medium – it’s a way to get a uniform surface contact between the meat and the pan. A thin coating of oil will give you an even caramelization and stop some parts of the meat from burning while others are still pale. So, if you want to get the perfect sear, don’t forget to add a bit of oil to the pan. It’ll make all the difference!
How Long Should You Sear For?
Searing your steak is an art form, and it’s all about getting that perfect crust. To get it just right, you’ll need to sear your steak for 2-3 minutes on each side. That’s all it takes to get that delicious, golden-brown crust that seals in all the flavor. Don’t forget to brush both sides with extra virgin olive oil before you start searing. This will help form the crust and give your steak that extra touch of perfection. So, if you want to be a master of the grill, remember to sear your steak for 2-3 minutes on each side. And don’t forget the olive oil!
Do You Sear Covered Or Uncovered?
Grilling with the lid on or off? It’s a question that’s been debated since the dawn of the BBQ. Here’s the deal: when you’re searing steaks and need to keep a close eye on it, leave the lid open. But when you move it to indirect heat, close the lid and let the smoke do its thing. For quick-cooking foods like fish, veggies, and hot dogs, you can keep the lid open the whole time. So there you have it – the answer to the age-old question of whether to grill with the lid on or off!
Is Searing Better Than Frying?
Searing is a great way to add flavor to a variety of proteins, like pork chops and fish, in a short amount of time. It involves using a little more fat and lower heat to brown the food. On the other hand, pan-frying requires higher heat and less fat to cook food that may take longer. So if you’re looking for a quick and tasty way to cook your proteins, searing is the way to go. Plus, it’s easier to clean up after than pan-frying!
