So you’ve just finished smoking a delicious brisket and you’re ready to serve it to your friends, but there’s one problem- the smoke coming out of the smoker is blue!
How do you get blue smoke out of a smoker? There are some things you can do to make it easier. I’ll tell you exactly how to do that in this article.
In this post we'll cover:
- 1 Unlocking the Secret to Thin Blue Smoke
- 2 Unlocking the Mystery of Thin Blue Smoke
- 3 Steering Clear of Dirty Smoke: The White, Gray, and Black Culprits
- 4 Unlocking the Mystery of Blue Smoke
- 5 Mastering the Art of Fire Management
- 6 Unlocking the Secret to Blue Smoke: Choosing the Right Wood
- 7 Unlocking the Secret: The Four Stages of Burning Wood
- 8 Mastering the Art of Air Flow Management
- 9 Scrub-a-Dub-Dub: A Clean Smoker is a Blue Smoke Hub
- 10 Mastering the Art of Thin Blue Smoke in Various Smokers
- 11 Conclusion
Unlocking the Secret to Thin Blue Smoke
When it comes to producing that sweet, thin blue smoke we all know and love, the type of wood you choose is critical. Remember, not all wood is created equal! To achieve the best results, make sure to:
- Use dry, seasoned wood: Wet or green wood will create thick, white smoke that can affect the taste of your meat.
- Opt for hardwoods: Hardwoods like oak, hickory, and maple are perfect for creating thin blue smoke. Avoid softwoods like pine, as they can produce a harsh, bitter taste.
- Experiment with different varieties: Each type of wood imparts a unique flavor to your meat, so don’t be afraid to mix and match to find your perfect smoky blend.
Building the Perfect Fire
The key to getting that thin blue smoke lies in proper fire management. Here are some tips to help you master the art of fire building:
- Start small: Begin with a small, hot fire, and gradually add larger chunks of wood as needed. This will help maintain a steady temperature and prevent flare-ups.
- Maintain a clean burn: Make sure your fire is burning efficiently by keeping an eye on the color of the smoke. If it starts to turn white, gray, or black, adjust your airflow or add more wood to achieve a cleaner burn.
- Control the heat: A low and slow cooking method is best for producing thin blue smoke. Keep your smoker at a lower temperature setting and resist the urge to crank up the heat.
Managing Airflow for Optimal Smoke
Airflow is essential for creating that thin blue smoke we’re all after. Here are some pointers to help you dial in the perfect airflow:
- Keep vents slightly open: Allowing plenty of air to flow through your smoker will help maintain a clean, hot fire. Be sure to adjust your vents as needed to achieve the right balance.
- Don’t smother your fire: Resist the temptation to add too much wood at once, as this can cause your fire to smolder and produce thick, white smoke.
- Monitor your smoker’s temperature: Use a reliable thermometer to keep an eye on your smoker’s temperature, and make adjustments as needed to maintain a steady, low heat.
Keeping Your Smoker Clean and Ready for Action
A clean smoker is essential for producing that sweet, thin blue smoke. Here are some tips to keep your smoker in tip-top shape:
- Clean out ash and debris: Regularly remove any ash, grease, or food bits from your smoker to ensure a clean, efficient burn.
- Check for proper seal: Make sure your smoker’s door or lid seals tightly to prevent any unwanted air leaks that could affect your smoke production.
- Maintain your smoker’s components: Regularly inspect and clean your smoker’s vents, grates, and other components to ensure they’re working properly and not obstructing airflow.
By following these tips and tricks, you’ll be well on your way to mastering the art of thin blue smoke. So go ahead, fire up that smoker, and let the mouthwatering aroma of perfectly smoked meat fill the air!
Unlocking the Mystery of Thin Blue Smoke
Thin blue smoke is the holy grail of BBQ enthusiasts. It’s the sign of a clean, well-managed fire that produces the perfect smoky flavor we all know and love. Remember, the key to great BBQ is reaching that stage where the smoke is thin, blue, and clean. Here’s why:
- Thin blue smoke contains the essential compounds that give your food that smoky character without overpowering it.
- It’s produced when wood is burning at the correct stage, creating a clean fire with minimal creosote and other unwanted particles.
- Proper air flow and fire management are critical to producing thin blue smoke, ensuring your meat is cooked to perfection.
Creating Thin Blue Smoke: The Process
Making thin blue smoke is a process that takes time, patience, and a bit of know-how. Here’s a quick rundown of what you need to do:
1. Choose the right type of wood: Different varieties of wood produce different flavors, so choose one that complements your meat. Commonly used types include hickory, mesquite, and applewood.
2. Use the correct size of wood: Small chunks or sticks are ideal, as they burn more evenly and produce a more consistent smoke.
3. Manage your fire: Keep the temperature low and steady, adding wood as needed to maintain a clean, hot fire.
4. Control air flow: Proper ventilation is essential to creating thin blue smoke. Make sure your smoker has a decent air flow, and adjust vents as needed.
5. Keep your smoker clean: Excess ash and debris can interfere with the smoke production process, so make sure to clean your smoker regularly.
Thin Blue Smoke: The Essential Ingredient for Great BBQ
In the world of BBQ, thin blue smoke is the secret ingredient that separates the good from the great. It’s what gives your food that mouthwatering smoky flavor without any of the bitterness or harshness that can come from white or gray smoke. So, the next time you fire up your smoker, remember these tips and aim for that elusive thin blue smoke. Your taste buds will thank you!
Steering Clear of Dirty Smoke: The White, Gray, and Black Culprits
Picture this: you’ve spent hours perfecting your fire management skills, selecting the right wood, and seasoning your meat to perfection. You’re ready for a slow-smoked BBQ experience that’ll make your taste buds sing. But then, you notice white, gray, or black smoke billowing from your smoker. Uh-oh.
Dirty smoke, as it’s called, is the result of incomplete combustion. It’s packed with microscopic particles that can ruin the flavor of your smoked meats. Instead of the heavenly blend of moisture, aromatics, and vapor that blue smoke provides, dirty smoke imparts an acrid, bitter taste that’ll have your guests reaching for the nearest beverage to wash it down.
Causes of White, Gray, and Black Smoke
Understanding the causes of dirty smoke is essential for any home smoking enthusiast looking to hone their skill. Here are the main culprits:
White Smoke:
Often caused by too much moisture in your fuel or wood, white smoke can also result from using green wood that hasn’t been properly seasoned. Additionally, if your coals are struggling to reach the right temperature, you might see white smoke as a result.
Gray Smoke:
Gray smoke is typically a sign that your fire isn’t getting enough oxygen. This can be due to poor airflow management or using too much fuel, which can smother the fire and prevent it from burning efficiently.
Black Smoke:
The most sinister of the dirty smoke trio, black smoke is usually a sign that something has gone seriously wrong. It can be caused by grease fires, burning plastic, or other foreign materials accidentally introduced to your smoker. If you see black smoke, it’s time to investigate and address the issue immediately.
Preventing Dirty Smoke: Tips and Tricks
Now that we’ve identified the causes of dirty smoke, let’s talk about how to prevent it from ruining your smoking experience:
Choose the Right Wood:
As mentioned earlier, using properly seasoned wood is crucial. Avoid green wood and make sure your wood is dry and free of mold or rot.
Manage Your Airflow:
Keep your smoker’s vents and dampers clean and clear, allowing for proper oxygen flow. Adjust them as needed to maintain the right temperature and avoid smothering your fire.
Monitor Your Fuel:
Don’t overload your smoker with fuel. Use just enough to maintain a steady temperature and add more as needed.
Keep It Clean:
Regularly clean your smoker to prevent grease buildup, which can lead to grease fires and black smoke.
By keeping these tips in mind, you’ll be well on your way to mastering the art of thin blue smoke and leaving those dirty smoke blues behind. Happy smoking!
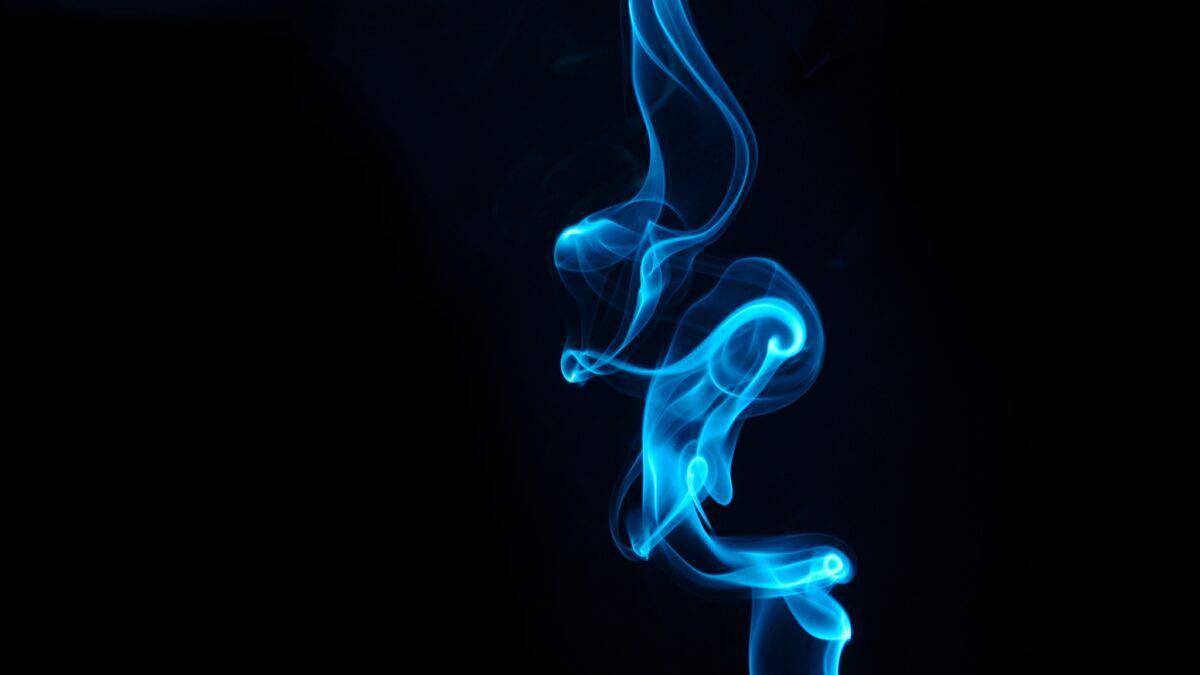
Unlocking the Mystery of Blue Smoke
Now, you might be wondering why we’re so obsessed with blue smoke. Well, let me tell you, it’s not just because it looks cool (although, it does). Blue smoke is the secret sauce to achieving that perfect, mouth-watering, smoky flavor we all crave when we think of barbecue. Here’s why:
- Blue smoke is a sign of complete combustion, which means your fire is burning efficiently and producing the optimal temperature for smoking.
- It carries the perfect balance of flavor, without overpowering your food with a bitter, acrid taste that can come from dirty smoke.
- Blue smoke indicates that your fire is burning clean, which is better for the environment and your health.
Blue Smoke: The Flavor Enhancer
When you’ve got that thin blue smoke wafting through your smoker, you know you’re in for a treat. The reason blue smoke is so desirable is because it imparts a subtle, yet distinct, smoky flavor to your food without overpowering it. Here’s how it works:
- As your wood smolders, it releases flavorful compounds like phenols and guaiacol that are carried by the smoke.
- These compounds infuse your food with that signature smoky taste we all know and love.
- Blue smoke has a higher concentration of these flavor-enhancing compounds, which means more deliciousness with every bite.
Blue Smoke: The Key to Consistency
If you’ve ever tried to smoke a brisket or a rack of ribs, you know that consistency is key. You want your meat to be tender, juicy, and evenly cooked throughout. That’s where blue smoke comes in:
- Blue smoke is produced when your fire is burning at the perfect temperature for smoking, which is typically between 225°F and 250°F.
- Maintaining this temperature range ensures that your meat cooks evenly and slowly, allowing the collagen to break down and the fat to render, resulting in tender, juicy meat.
- By keeping an eye on the color of your smoke, you can easily monitor your fire and make adjustments as needed to maintain that ideal temperature.
So, there you have it – the reasons why blue smoke is the ultimate goal for any pitmaster. With a little practice, patience, and attention to detail, you’ll be well on your way to mastering the art of blue smoke and impressing your friends and family with your smoking skills. Happy smoking!
Mastering the Art of Fire Management
Now, let me tell you about the time I learned the importance of fire management in achieving that perfect thin blue smoke. You see, fire is the heart and soul of your smoker, and without proper management, you’ll end up with a disappointing, acrid cloud of white or gray smoke. So, let’s dive into the crucial role fire plays in smoke production:
- Fire provides the heat necessary to break down the wood’s compounds, releasing those flavorful smoke particles.
- The temperature of the fire affects the color and quality of the smoke. Too hot, and you’ll get thick white smoke; too cool, and you’ll struggle to maintain a consistent smoke flow.
Building and Maintaining the Ideal Fire
I remember the first time I built a fire in my smoker, I was so eager to get started that I just threw in a bunch of wood and hoped for the best. Boy, was that a mistake! Here’s what I’ve learned since then about building and maintaining the ideal fire:
- Start with a small, hot fire: Use smaller pieces of wood or charcoal to create a hot, clean-burning fire. This will help you avoid that dreaded thick white smoke.
- Add larger pieces of wood gradually: Once you’ve got a good fire going, add larger pieces of wood one at a time. This will help maintain a steady temperature and smoke flow.
- Keep an eye on the fire: Don’t just set it and forget it! Regularly check on your fire, making sure it’s burning cleanly and efficiently. Adjust the wood or air flow as needed to maintain the ideal temperature and smoke color.
Unlocking the Secret to Blue Smoke: Choosing the Right Wood
You know, I’ve always believed that the wood is the unsung hero of any good barbecue. It’s the key element that creates that thin blue smoke we all crave. But not all wood is created equal, my friends. Different types of wood can cause different stages of burning, and understanding which type is best for your cooking is essential.
Good Wood: The Versatile Choice
When it comes to producing that thin blue smoke, the choice of wood is critical. You want a good, dry supply of wood chunks that are versatile enough to mix and match with a variety of meats. Some of my personal favorites include:
- Apple: A nice, subtle flavor that pairs well with almost any meat
- Hickory: A classic choice that’s commonly used in barbecue, with a strong, smoky flavor
- Oak: A more neutral option that’s great for longer cooks
Wet vs. Dry: The Great Debate
Now, some people swear by using wet wood, while others are die-hard fans of dry wood. I’ve tried both, and I can tell you that the key to producing that thin blue smoke is using properly dried wood. Wet wood can cause white or gray smoke, which is not what we’re after. Dry wood, on the other hand, burns hotter and produces fewer heavy compounds, resulting in that beautiful blue smoke.
Quality Matters: Don’t Skimp on Your Wood Supply
I know it’s tempting to cut corners and go for the cheapest wood you can find, but trust me when I say that quality matters. The type of wood you use can make or break your barbecue experience. Low-quality wood can contain a number of undesirable elements, like sap or bark, which can create black or gray smoke. So, do yourself a favor and invest in some good-quality wood chunks. Your taste buds will thank you.
Understanding the Stages of Burning Wood
To get that thin blue smoke, it’s important to know the different stages of burning wood. When you first start your fire, the wood goes through several changes before it gets to the stage where it produces that coveted blue smoke. Here’s a quick rundown of the stages:
1. Beginning: The wood starts to heat up, and moisture is released
2. Hot and heavy: The wood starts to burn, producing heavy compounds and white or gray smoke
3. The sweet spot: The wood is burning at the perfect temperature, creating thin blue smoke
4. The end: The wood is completely burned, and the smoke starts to thin out
Adding Wood: Timing is Everything
When it comes to adding wood to your smoker, timing is everything. You want to add wood at the beginning of the cook, and then continue to add more as needed throughout the entire process. This ensures that you maintain a consistent supply of smoke, which is essential for creating that nice, smoky flavor and the all-important smoke ring.
So, there you have it, folks. The secret to unlocking that thin blue smoke is all about choosing the right type of wood and understanding how it affects your cook. With a little practice and some quality wood, you’ll be well on your way to barbecue bliss.
Unlocking the Secret: The Four Stages of Burning Wood
The first stage of burning wood is what I like to call the “warm-up act.” This is when the wood starts to heat up and dry out. You see, wood contains a good amount of moisture, and for it to burn properly, it needs to be dry. This stage is essential, but it’s just the beginning. At this moment, the wood is not yet producing that sweet, thin blue smoke we’re after.
Stage 2: The Fiery Dance
The second stage is when things start to get interesting. As the wood dries out, it begins to release a variety of compounds, including gases and tar. This stage is commonly known as pyrolysis. The heat causes the wood to break down and release these compounds, which then burst into flames. This is the stage where you’ll see the typical red and orange flames dancing around the wood. However, we’re not quite at the blue smoke stage yet.
Stage 3: The Blue Smoke Sweet Spot
Ah, the third stage – this is where the magic happens. This is the stage we want to be at for the best barbecue experience. At this point, the wood has released most of its compounds, and the remaining gases and tar are burning off. This creates a nice, hot fire that produces the coveted thin blue smoke. Here’s why this stage is so important:
- The thin blue smoke contains the pure, natural flavors needed for great barbecue.
- The high heat at this stage is critical for properly cooking your meat.
- The blue smoke is less likely to leave a bitter, black residue on your food.
So, how do you know when you’ve reached this stage? Well, you’ll probably notice a change in the smoke’s color and consistency. It will turn from a thick, white or gray smoke to a thin, blue one. This is the moment you’ve been waiting for – the sweet spot for cooking your meat to perfection.
Stage 4: The Final Bow
The fourth and final stage is when the wood has burned down to coals. At this point, the wood has given up all its energy, and there’s no longer any smoke being produced. While this stage is not ideal for smoking meat, it’s still great for grilling or as a heat source for other types of cooking.
To sum it up, understanding these four stages of burning wood is essential for mastering the art of producing thin blue smoke. By knowing what to look for and how to manage your fire, you’ll be well on your way to becoming a true barbecue aficionado.
Mastering the Art of Air Flow Management
Now, let me tell you a little secret: managing your air flow is the key to unlocking that beautiful blue smoke. You see, air flow control is essential in preventing excess smoke from producing that dreaded dirty smoke. When you maintain proper air flow, you allow the right components to be released, creating that unique flavor that contributes to the deliciousness of your smoked food.
Primary Techniques to Manage Air Flow
Getting the hang of air flow management might seem intimidating at first, but trust me, with a little practice, you’ll be a pro in no time. Here are some primary techniques to help you manage air flow like a champ:
- Keep your exhaust open: This is the golden rule of air flow management. An open exhaust allows for better control of heat and smoke inside your smoker.
- Adjust your intake vents: These little guys are your primary means of controlling the heat. Monitor the color and amount of smoke being produced, and adjust the vents accordingly.
- Use fans: If you’re struggling to maintain proper air flow, consider using fans to help circulate the air. Just be sure to choose the right type and size for your smoker.
Avoiding Common Air Flow Mishaps
As with any skill, practice makes perfect. But it’s also a good idea to be aware of some common air flow mistakes that can cause improper smoke production:
- Overloading your smoker: Too much food can restrict air flow, leading to dirty smoke. Remember, less is more when it comes to smoking.
- Ignoring stored particles: Over time, particles from previous smoking sessions can build up and affect air flow. Keep your smoker clean to avoid this issue.
- Skipping essential steps: Don’t cut corners when it comes to prepping your smoker and wood. Proper preparation is key to achieving that perfect blue smoke.
Putting It All Together: Air Flow Management and Your Smoked Pork
So, you’ve got your smoker prepped, your wood is at Stage 3, and you’re ready to smoke some mouthwatering pork. Just remember to keep an eye on your air flow, and adjust as needed. With a little practice and these air flow management techniques, you’ll be well on your way to producing that thin blue smoke that’ll have your friends and family begging for more.
Scrub-a-Dub-Dub: A Clean Smoker is a Blue Smoke Hub
Let me tell you, folks, keeping your smoker clean is no joke. It’s an essential part of the blue smoke process. A dirty smoker can cause all sorts of problems, like bad smoke, poor meat quality, and even health risks. So, let’s dive into why it’s so important to keep that smoker squeaky clean.
- First and foremost, a clean smoker helps you control the smoke flow. Proper airflow is key to achieving that perfect thin blue smoke we all crave.
- Dirty smokers can cause off-flavors in your food. Trust me, nobody wants to taste last month’s brisket on this week’s ribs.
- A buildup of grease and other materials can create a fire hazard. Keep your smoker clean to avoid any extreme situations.
Start Clean, End Clean: The Cleaning Process
Now that we understand the importance of a clean smoker, let’s talk about the cleaning process. It’s not rocket science, but it does require some elbow grease and attention to detail.
1. Begin by removing any leftover chunks of wood or charcoal from your smoker. This will help prevent any bad smoke from the start.
2. Next, give the grates a good scrub with a wire brush. This will remove any trapped food particles and grease.
3. Don’t forget the water pan (here’s why)! Empty it and give it a thorough cleaning. A dirty water pan can cause unwanted flavors in your meat.
4. Wipe down the entire smoker, inside and out, with a damp cloth. This will help remove any fine particles and residue.
5. Finally, make sure your smoker is completely dry before you start cooking. Moisture can affect the quality of your smoke.
Consistency is Key: Regular Smoker Maintenance
Alright, so we’ve got our smoker clean and ready to go. But the job doesn’t end there, my friends. Regular maintenance is crucial to keep that blue smoke flowing.
- Check your smoker for any signs of wear or damage. Replace any parts that are no longer functioning properly.
- Keep an eye on your wood and charcoal supply. Make sure you always have the right types and sizes of wood chunks on hand.
- Monitor your smoker’s temperature and airflow during the cooking process. Make adjustments as needed to maintain that perfect blue smoke.
In the end, it all comes down to understanding your smoker and its needs. A clean, well-maintained smoker is a powerful tool in the hands of a skilled pitmaster. So, keep that smoker clean, and you’ll be well on your way to mastering the art of thin blue smoke.
Mastering the Art of Thin Blue Smoke in Various Smokers
As a seasoned pitmaster, I can’t stress enough the importance of choosing the right wood for your smoker. Different types of wood produce varying flavors and smoke colors. To achieve that sweet, thin blue smoke, you’ll want to:
- Opt for hardwoods like oak, hickory, or fruitwoods such as apple or cherry.
- Avoid softwoods like pine, as they contain too much resin and create thick, white smoke.
- Use wood chunks or logs, not chips, as they burn slower and produce a more consistent smoke.
Size Matters: Adjusting Wood Size for Different Smokers
Depending on the type of smoker (here’s each type) you’re using, you’ll need to adjust the size of your wood chunks to ensure optimal smoke production. Here’s a quick guide:
- For electric smokers, use small wood chunks or even chips, as they don’t require as much heat to smolder.
- For charcoal or gas smokers, go for larger wood chunks that can handle higher heat levels.
Managing Moisture: Wet vs. Dry Wood
There’s a long-standing debate among pitmasters about whether to use wet or dry wood. In my experience, both methods can create thin blue smoke, but it’s all about finding the right balance:
- Wet wood: Soak your wood chunks in water for about an hour before adding them to the smoker. This slows down the burning process, creating a longer-lasting, smoky flavor.
- Dry wood: If you prefer a more intense, concentrated smoke, skip the soaking and use dry wood chunks. Just be prepared to add more wood throughout the cooking process.
Airflow: The Secret to Smoke Control
Managing airflow is critical for achieving thin blue smoke in any smoker. Here’s how to adjust the vents and dampers on different types of smokers:
- Electric smokers: Keep the top vent slightly open to allow smoke to escape and prevent it from becoming too thick.
- Charcoal smokers: Start with the bottom vent fully open and the top vent partially open. Adjust as needed to maintain a steady temperature and thin blue smoke.
- Gas smokers: Keep the bottom vent closed and the top vent partially open. Adjust the gas flow to maintain the desired temperature.
Temperature: The Sweet Spot for Thin Blue Smoke
Finding the perfect temperature for your smoker is crucial for producing thin blue smoke. Here are some general guidelines for different types of smokers:
- Electric smokers: Aim for a temperature between 225°F and 250°F.
- Charcoal smokers: Maintain a temperature between 225°F and 275°F.
- Gas smokers: Keep the temperature between 225°F and 300°F.
Remember, practice makes perfect. The more you experiment with your smoker, the better you’ll become at creating that elusive thin blue smoke. Happy smoking!
Conclusion
So, there you have it- all the secrets to getting that blue smoke coming out of your smoker.
The most important thing is to use the right kind of wood and to manage the fire properly. You also need to keep the smoker clean and maintain the proper air flow.
So, don’t be afraid to experiment and soon you’ll be able to produce that delicious blue smoke everyone loves!
