Smoking food has become a common practice in the culinary world.
The technique was originally developed to preserve meats, but it has since evolved into a way to add flavor and texture to foods.
This doesn’t mean that preserving food for longer is not a good reason to smoke anymore!
The practice still works as well as it did thousands of years ago. But you may be wondering how exactly you can smoke food to preserve it?
It is not as simple as it seems, as certain preparations are necessary to make sure your smoked meat can keep for longer periods of time.
In this post, I will explain what is the best way to prepare and smoke meat to preserve it for weeks or even months.
In this post we'll cover:
Different ways to smoke meat for preservation
Before we dive into the procedure for smoking meat for preservation, let’s get our basics straight.
In general, there are two main ways to smoke meat:
- hot-smoking
- cold-smoking
Both of these methods come with different techniques and results. Let’s see how they compare.
Hot smoking
Hot smoking is one of the most prevalent and widely used methods for smoking meat.
As the name suggests, the meat is smoked at very high temperatures, standing between 150F and 160F in a smoker.
You cook the food, while at the same time imparting a delicious smokey flavor to it.
But here’s the thing! Among the many reasons meat is hot-smoked, preservation is probably not at the top of the list.
That’s because, during hot smoking, the meat is essentially ‘cooked’ over smoke, and not ‘dehydrated,’ which is necessary for preservation.
So even if the high temperature halts the bacterial activity for a while, the internal moisture of the meat will provide safe ground for dangerous organisms to grow again once the temperature goes down.
This means that hot-smoked meat generally only keeps up to four days in your fridge.
Hot smoking food is great if you plan to serve it with all its juicy goodness and the signature smoky flavor within a couple of hours or max a couple of days after smoking.
However, if we talk about smoking meat for long-term preservation like months or even a year, cold smoking is the only solution.
Learn how to keep the meat wet during the smoking session with a mopping sauce.
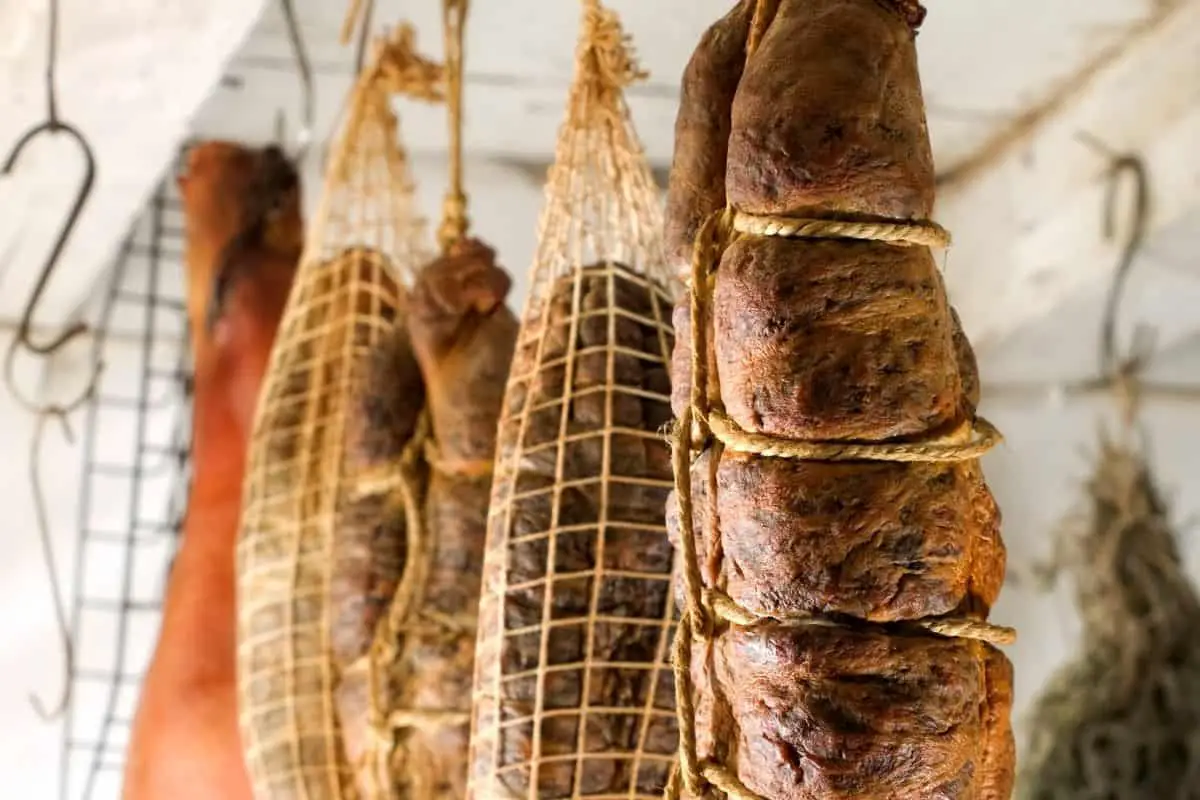
Cold-smoking
Don’t know much about cold smoking? Let’s discuss it a bit deeper.
In cold smoking, the meat or other foods are smoked at a low temperature of 70-77 degrees F for longer durations, usually 12-48 hours.
Unlike hot smoking, cold smoke dries the meat thoroughly, eliminating any chances for dangerous organisms like bacteria to grow that could cause the meat to spoil prematurely and make you sick.
One of the biggest advantages of properly cold smoking meat is it can be kept for about months even without refrigeration.
However, with refrigeration, the shelf life could increase to as much as a year.
Preserving meat with cold smoke involves both curing and smoking.
The meat is first cured with curing mixtures or simply a ‘curing salt’, which contains all the food preservation essentials, including salt, sugar, nitrate, and nitrite.
Next, you will need to dehydrate the meat. Removing as much of the moisture inside the meat will help it keep a lot longer.
Finally, during cold smoking, the smoke enters the meat and imparts its antibacterial compounds like phenols and acids to the meat, killing off any bacteria left in the cured meat and preparing it for long-term storage.
Also read about the Unknown secret to the best Pellet Smoker Beef Jerky Recipe
Preserving meat through smoking: a step-by-step guide
Now that you know the different meat preservation techniques, let’s get into some details and discuss the smoking process for long-term meat preservation in a step-by-step manner.
Please keep in mind that I’ll be only discussing the steps for cold smoking as it’s the standard method for meat preservation.
That being said, let’s jump in!
Step# 1: Gather your materials
Well, that’s pretty obvious. You will need to have some supplies at hand to smoke the meat.
These include wood chips, a smoker, and utensils to handle the meat.
You will also need a curing mixture, or the essential ingredients for marinade or brine if you want to add some extra flavor to the meat.
Step# 2: Choose your smoker
As I have already established, cold smoking is more complex than hot smoking and will require a bit more time for the meat to get perfectly smoked.
Plus, as you will be likely preparing a lot of meat for preservation, you will need every bit of extra space you can get.
That being said, the following are your best options at hand:
- Smoker with cold smoke generator: This is the easiest and most convenient method of cold smoking meat, although not the most budget-friendly. Use your own smoker (either electric, pellet, charcoal, or gas) and buy a special cold smoke generator attachment to turn it into a cold smoker.
- Smokehouse: A smokehouse is one of the oldest and perhaps the most effective options to cold smoke a huge amount of meat and store it for longer periods, whether it’s beef, pork, or fish. It is effectively an outdoor wooden closet with a special smokebox to circulate the smoke (you can make one yourself, but it is quite a project).
- Custom-made bbq smoker: Well, if you are an avid DIY, this could also be one of your options. A custom-made, DIY bbq smoker allows you to decide the shape, proportion, internal space, and everything.
Check out our guide on how to build your very own bbq smoker!
Step# 3: Choose the right wood chips
Even with the least experience in smoking meats, you must know that the wrong wood can totally ruin the party for you, whether you are thinking of preserving meat or serving it straight off the smoker.
That being said, it’s crucial to choose the right wood flavor for the right meat.
Usually, nutty and sweet flavored woods like pecan, cherry, and apple are best for pork or wild game meats, while smoky flavored woods like mesquite, oak, and hickory are for beef and poultry and fish.
Make sure not to use conifers like cedar etc. And also, stay away from treated or painted woods. Those are toxic, and can impart the most least desired flavors you can think of.
Step# 4: Prepare your meat
The most essential step before smoking is to prepare the meat properly.
This includes trimming excess fat, removing bones, and washing the meat thoroughly.
- Trimming fat: Fat is the enemy of smoke flavor. It prevents the smoke from penetrating the meat and permeating its surface. Moreover, it could also prolong the dehydration time of the meat. Thus, the leaner the meat, the better.
- Removing bones: One thing you should never forget when preparing meat for preservation? It is removing the bones. Remember, you want the meat to be perfectly soft before curing it.
- Washing meat: Remove any dirt or grime from the meat by washing it with cold water. Afterward, pat it dry with the help of a paper towel.
- Cutting: Once the meat is fully cleaned, it’s time to cut it to the proper size, usually in quarter-inch strips if you are planning to make a jerky. You could also keep the meat whole if you are planning to preserve a whole cut instead of strips.
Step# 5: Cure the meat
Depending on whether you have cut the meat in strips or planning to smoke a whole cut, there are two recommended curing methods, which are:
- brining (or wet curing)
- dry curing
Here’s how you do both:
Wet curing
Wet curing is generally preferred for jerkies.
It involves submerging the jerky cuts into a solution containing curing salt, sea salt, sugar, water, and any other ingredients or spices of your choice to impart flavor to the meat.
Generally, a strong brine curing solution will take about a day or two to perfectly cure the small meat cuts.
However, if we talk about big chunks, let’s say, a cut of whole belly bacon, it could take about 4 to 5 days, or even more.
Although wet curing is primarily used in industrial-scale meat preservation processes, it has also become quite a popular practice among common folks due to its convenience.
Dry curing
Compared to wet curing, dry curing the meat is a relatively older, but effective method.
During dry curing, the meat is covered in a mixture of curing salt and sugar.
For perfect curing, the amount of salt applied is kept equivalent to about 3% of the total weight of the meat cut.
Moreover, the meat is left covered by the salt mixture for at least one to five days before smoking, depending on the size.
During this duration, the salt effectively penetrates the meat and technically dehydrates it while making a saline environment that inhibits the growth of any bacteria.
This makes the meat fit for cold smoking, where it will be exposed to the “danger zone” temperatures for a few days before you can store it.
If you prefer the end result to be a bit less salty, make sure to rinse the meat after curing, to remove most of the salt.
To reduce the salt even further, you can soak the meat in water for a couple of hours again.
Next, it’s time for drying the meat!
Step 6: Let the meat dry (and grow a pellicle)
Next, it is important to dehydrate the meat. This can be done by simple air drying if you have a space where it is cool enough (below 68° Fahrenheit) and with enough air circulation.
You can place the meat on racks or hang it on hooks in a cool room, box, or shed. A fan might help circulate the air efficiently.
You can also use a food dehydrator or oven (just the fan, no heat) for this. If you are smoking fish, the fridge is the best place to let the meat dry.
The goal is to allow the meat to reduce its moisture content and to grow a pellicle on the outside of the meat.
A pellicle is a tacky outer layer of proteins that will play a role in enhancing the flavor and color produced by the smoke.
It will also act as a protective barrier for the food, as it seals in the moisture and makes the meat dry and firm to the touch.
Don’t let the pellicle get too thick, as this will result in a tough outer layer.
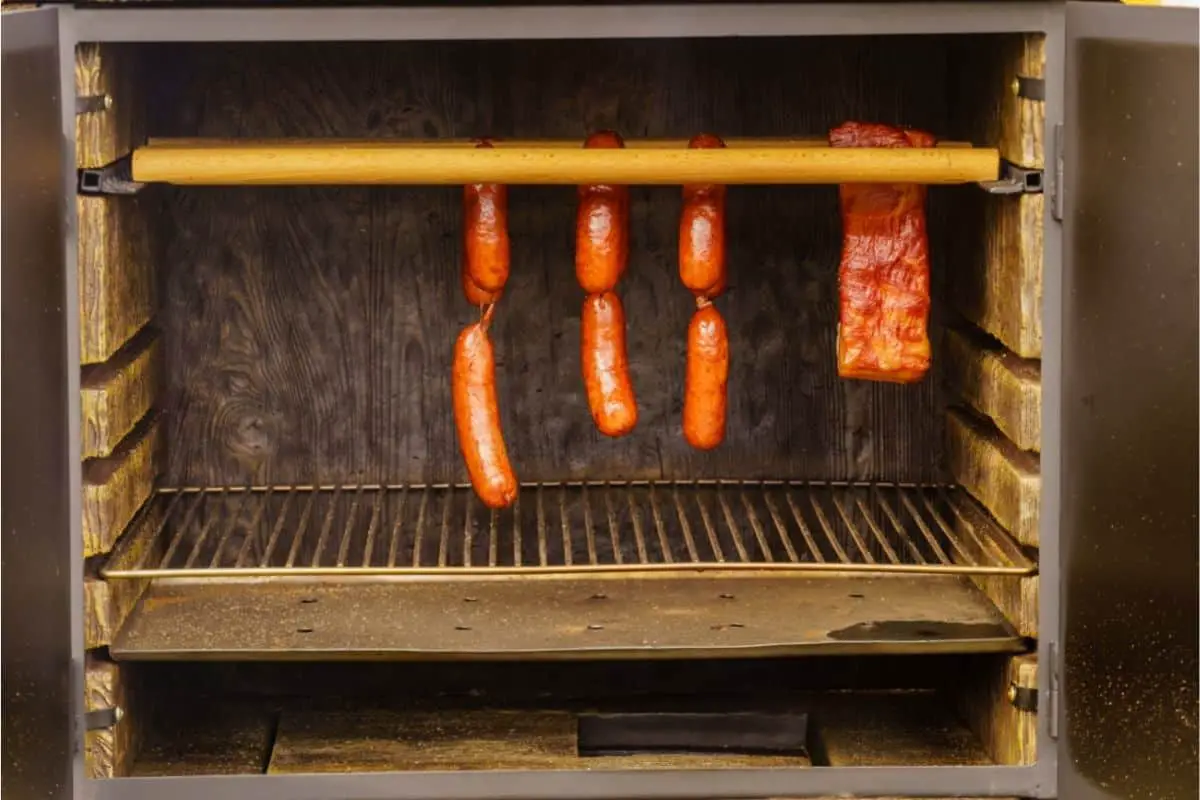
Step 7: Put it in the smoker!
After curing and drying, the meat is ready to be cold smoked.
Put the meat inside the smoker or smokehouse, with the smoker or smokehouse temperature lingering between 70 to 77 degrees F, also known as the “cold smoke.”
Although the temperature itself is not very suitable for smoking meats generally, it is important to not exceed the aforementioned mark if you don’t want to cook the meat.
Moreover, you shouldn’t worry about the contamination as the smoke itself is full of different anti-bacterial compounds, preventing even the minute chances of bacterial growth.
The duration of cold smoking could last for a day or two up to many days, or even a week, depending on which cuts you are cold smoking and their size.
Tom from Eat Cured Meat gives a full rundown of the process here, to really help you through it:
Step# 7: Freeze it!
As mentioned, cold-smoked meat could last you for months without refrigeration. However, you can still refrigerate or freeze it to increase its shelf life.
Freezing temperatures minimize even the slightest chances of bacterial growth while protecting the meat from external contaminants at the same time.
Final thoughts
Smoking can preserve your meat, and as it is done using wood smoke, it is done with natural preservatives.
Aside from preserving it, smoking results in a delicious flavor and aroma that will really enhance the meat’s flavors, as well as add some flair to it.
Looking to make bacon jerky? Here’s how to get it perfectly crispy!
